
You wake up at 2 a.m., head to the kitchen for water, and every single step announces your presence to the entire house. That rhythmic creak under your feet isn’t just annoying — it starts to feel like the house itself is falling apart.
Here’s the truth: squeaky floors are one of the most common home issues homeowners face, and in the vast majority of cases, you can fix them yourself without tearing up the floor or spending hundreds on a contractor.
This guide covers every situation — hardwood, carpet, LVP, laminate, old houses, new construction, from above, from below — in plain language that anyone can follow.
Why Floors Squeak in the First Place

A squeaky floor isn’t a mystery. It’s wood (or a flooring material) rubbing against something it shouldn’t be rubbing against.
Floors are built in layers. Under your finished floor (hardwood, carpet, LVP, or laminate) sits a subfloor, usually plywood or OSB. Below that are the floor joists — the structural beams that support everything.
When any of these layers start moving against each other, friction creates noise.
The most common causes include:
- Loose subfloor panels — nails loosen over time as wood expands and contracts with humidity changes, letting the subfloor shift slightly underfoot
- Nail pops — nails originally securing the subfloor to the joists back out slightly, creating a small gap that flexes when stepped on
- Gaps between flooring and subfloor — finished flooring that has lifted slightly away from the subfloor rubs as it deflects under weight
- Joist bridging movement — small pieces of wood or metal placed between joists for stability can loosen and rattle
- Seasonal wood movement — wood swells in humid summer months and shrinks in dry winter months, and that cycle works fasteners loose over years
Understanding the cause makes it much easier to choose the right fix.
Tools and Materials You’ll Need
You don’t need a professional toolkit to fix squeaky floors. Most fixes use items you may already have at home.
For surface fixes (from above):
- Drill
- Wood screws (appropriate length for your floor thickness)
- Stud finder
- Talcum powder or powdered graphite
- Putty knife or thin spatula
- Colored wood filler or wax crayon (to fill screw holes)
- Carpenter’s glue
For fixes from below:
- Drill
- Short wood screws (critical — wrong length punches through the floor)
- Wood shims
- Construction adhesive
- Flashlight
Optional but helpful:
- Stud finder — makes locating joists much faster
- Squeak-relief kit (available at most hardware stores — a special screw system designed specifically for this job)
Once you have your tools ready, the fix depends on which type of flooring you’re dealing with.
How to Fix Squeaky Floors Hardwood
Hardwood floors are the most rewarding to fix because you can often solve the problem from the surface with minimal evidence afterward.
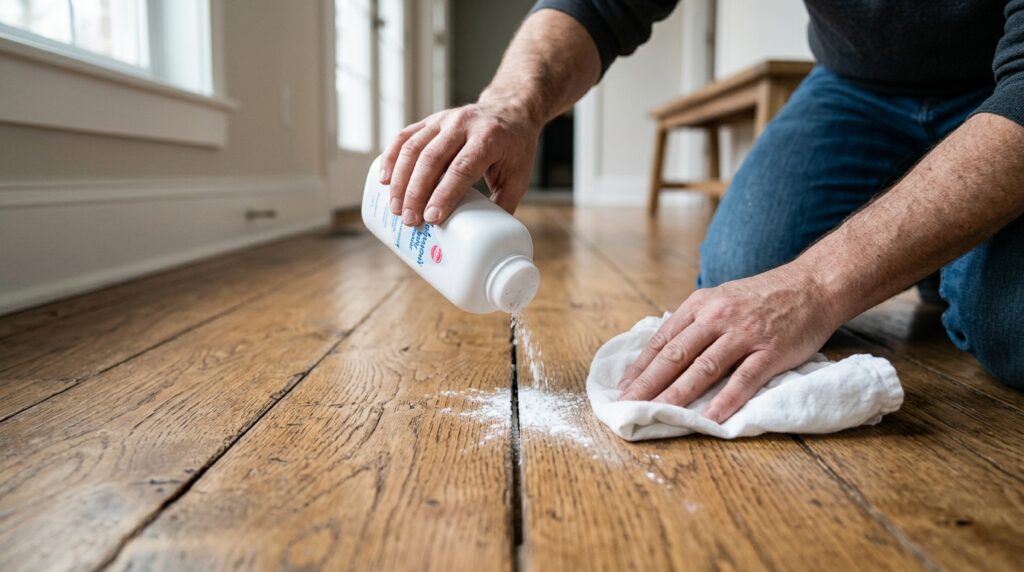
Method 1 — Powdered Lubricant (Easiest Fix)
This is the quickest thing to try and it works surprisingly well for mild squeaks.
Sprinkle talcum powder, powdered graphite, or powdered lubricant directly into the squeaky joint between two floorboards. Place a cloth over the area and walk on it repeatedly to work the powder down into the gap. Sweep away the excess.
The powder lubricates the friction point without any drilling or damage to your floor. It won’t solve structural issues, but for boards rubbing against each other at the surface, it works quickly and is completely invisible.
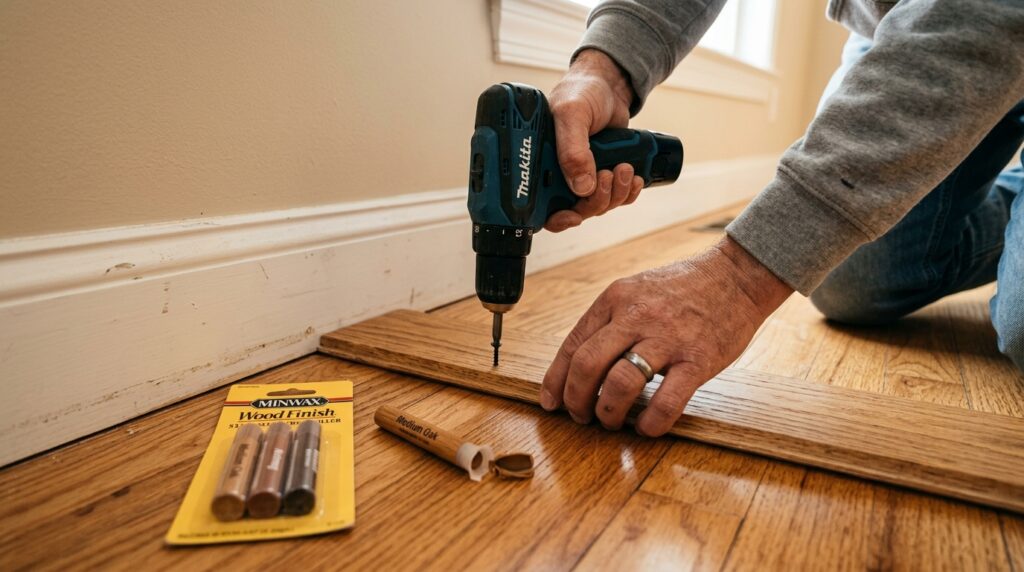
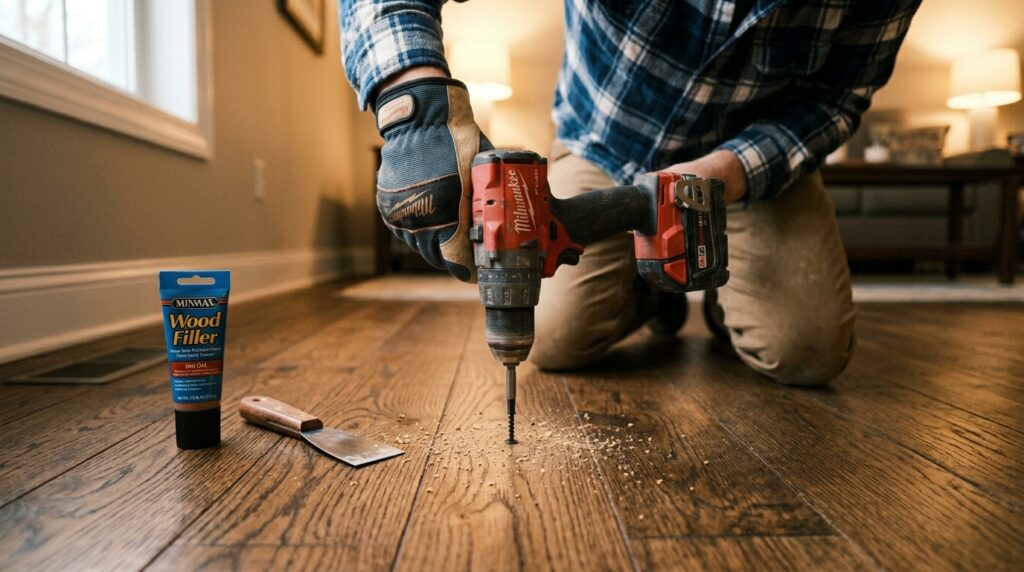
Method 2 — Drive Screws from Above
If the lubricant doesn’t hold, the subfloor is likely moving under the hardwood. This requires a screw to pull the layers tight.
Use a stud finder to locate a floor joist near the squeak. Drive a 2-inch trim-head screw at a slight angle through the hardwood and into the subfloor or joist below. The angled entry makes it easier to countersink and fill.
Fill the hole with a colored wood filler that matches your floor tone. When dry, it’s nearly invisible.
Method 3 — Squeak-Relief Screw Kit
These kits are designed specifically for hardwood floor squeaks. A special screw is driven into the floor, then snapped off below the surface at a scored point, leaving no visible entry. The remaining screw holds the floor layers together firmly.
It’s one of the cleanest fixes available for how to fix squeaky floors hardwood without leaving any visible marks.
How to Fix Squeaky Floors Under Carpet
Carpet actually makes squeaky floor repairs easier in some ways — you can pull it back, fix what’s underneath, and re-lay it without anyone knowing you were there.
Locate the Squeak
Walk slowly across the room and pinpoint the exact board or area that squeaks. Mark it with a piece of tape on the carpet surface.
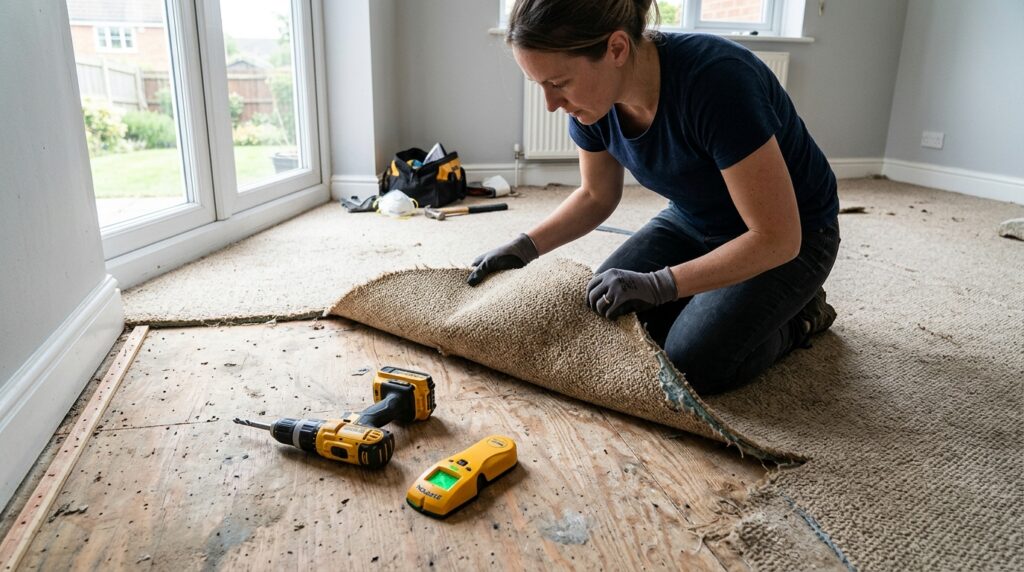
Pull Back the Carpet
Carpet typically isn’t glued along the center — it’s held by tack strips around the perimeter. Use a pair of pliers to grip the carpet at a corner near your mark and pull it back carefully. The carpet will detach from the tack strip. Roll it back to expose the subfloor.
If there’s a pad underneath, fold it back as well.
Drive Screws into the Subfloor
With the subfloor exposed, locate the floor joist using a stud finder or by tapping (solid vs. hollow sound). Drive 2-inch screws through the subfloor and into the joist at the squeak point.
If the subfloor panels themselves are loose and not attached to a joist directly at the squeak, drive screws at angles from the panel edges down into whatever solid material is below.
Re-lay the Carpet
Press the carpet back over the tack strips firmly, starting at one end. Use a knee kicker tool (inexpensive to rent from hardware stores) to re-stretch and seat it if needed.
For how to fix squeaky floors under carpet, this method is effective, low-cost, and completely invisible when done correctly.
How to Fix Squeaky Floors Under LVP
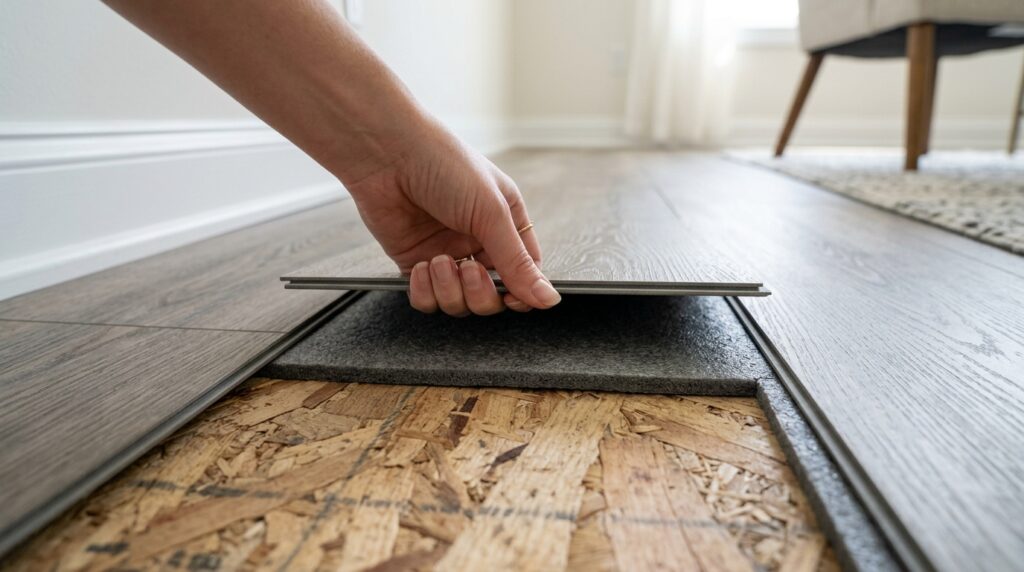
Luxury vinyl plank (LVP) is a floating floor, meaning it’s not glued or nailed down — the planks simply click together and float over the subfloor. This creates a unique challenge for squeaky floors.
Because the planks aren’t fastened down, you can’t simply screw them in place. The squeak is almost always coming from either:
- The subfloor underneath the LVP moving against the joists
- The LVP planks clicking against each other under foot pressure
- Debris or uneven spots under the underlayment causing flex
Fix 1 — Check for Debris
LVP needs a clean, flat subfloor to lay properly. Lift a plank near the squeak (they unclick from each other) and inspect for any debris, dried compound blobs, or raised screw heads on the subfloor surface. Remove or sand down anything that causes the LVP to bridge or flex.
Fix 2 — Address Subfloor Movement
If the subfloor itself is moving (a more common cause), the best approach is to access it from below if possible — see the section on fixing from underneath.
If you can’t access it from below, partially disassemble the LVP (start from the nearest wall, unclick planks until you reach the squeak area) and screw the subfloor panel to the joist directly. Reassemble the LVP.
Fix 3 — Add Underlayment Tape
Sometimes LVP squeaks because the foam underlayment has shifted, creating a gap where the floor “bridges” and flexes. Lift the planks, reposition the underlayment flat and gap-free, and tape seams with underlayment seam tape before re-laying the planks.
Learning how to fix squeaky floors under LVP starts with identifying whether the noise is in the subfloor or the float layer itself.
How to Fix Squeaky Floors Under Laminate

Laminate floors are also floating floors, so the approach is nearly identical to LVP. However, laminate is thinner and slightly more rigid, which can make it more sensitive to subfloor imperfections.
Most Common Causes in Laminate
- Subfloor dips or humps causing the laminate to flex and bridge
- Swollen laminate edges from moisture exposure (laminate swells more than LVP)
- Loose or gapping transitions at doorways and walls that allow movement
- Underlayment gaps causing hollow spots
Surface Fix — Injecting Adhesive
For minor squeaks in laminate where you don’t want to pull up planks, a small amount of construction adhesive can be carefully injected into the joint between planks using a syringe or fine-nozzle applicator. Apply weight immediately and let it cure. This restricts movement at the point of friction.
This isn’t a long-term structural fix, but for surface-level rubbing, it can quiet things down quickly.
Proper Subfloor Fix for Laminate
Disassemble back to the squeak area by unclicking planks row by row. Flatten any high spots on the subfloor using a belt sander or floor leveling compound. Secure any loose subfloor panels with screws before re-laying the laminate.
Knowing how to fix squeaky floors under laminate is largely about getting the subfloor perfectly flat and stable before the floating floor is re-laid.
How to Fix Squeaky Floors from Below
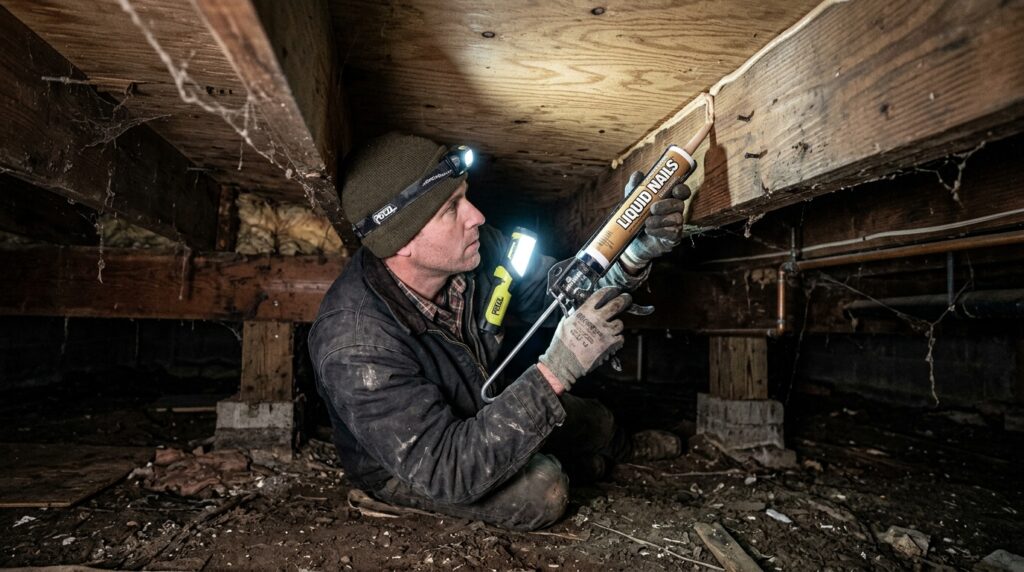
If you have access to a basement or crawl space underneath the squeaky floor, fixing from below is often the cleanest and most effective approach — no visible evidence on the finished floor at all.
This method works for any floor type above because you’re addressing the structural layers (subfloor and joists) directly.
Step 1 — Find the Squeak from Below
Have a helper walk on the floor above while you’re underneath. Watch and listen for movement. You’ll often see the subfloor flexing slightly or hear the friction clearly from below. Mark the joist or panel location with chalk.
Step 2 — Tap in Shims
If there’s a gap between the subfloor and the top of a joist, that gap is the source of movement. Slide a wood shim coated lightly in carpenter’s glue into the gap. Tap it in until it’s snug — not so tight that it lifts the floor above, just enough to eliminate the gap.
Don’t force the shim. The goal is to fill the empty space, not apply upward pressure.
Step 3 — Apply Construction Adhesive
For a longer-lasting fix, run a bead of construction adhesive along the top of the joist where it meets the subfloor. The adhesive bonds the surfaces together and eliminates any future rubbing.
Step 4 — Add Blocking Between Joists
If an entire section of floor feels springy and squeaks across a wide area, the joists may lack bridging. Cut a 2×4 to fit between the joists and nail or screw it in as blocking. This stiffens the floor system and often eliminates widespread squeaking.
Knowing how to fix squeaky floors from below gives you access to the source of the problem and typically produces the cleanest, most lasting result.
How to Fix Squeaky Floors from Above
Not everyone has basement or crawl space access. When working from above is your only option, there are still several effective approaches.
Locate the Joist
Stud finders work through flooring, though results can vary on thicker hardwood. Alternatively, look for nail patterns — countersunk nail heads in a line usually indicate a joist below.
Most joists are spaced 16 inches apart on center in residential construction. Once you find one, you can measure out from there.
Drive Screws at an Angle
Drive screws through the finished floor at a 45-degree angle, aiming for the joist below. Use trim-head screws to minimize the head size. Countersink slightly so the head sits below the surface.
Fill the holes with appropriately colored wood filler or wax fill sticks that match your floor. For how to fix squeaky floors from above, this is the most widely used method.
Use Adhesive at Board Edges
For hardwood floors where boards are rubbing at their edges, work carpenter’s glue into the joint with a thin putty knife. Wipe away excess and apply weight (stack books or place furniture temporarily over the area) while it cures. This bonds the boards at their edges and eliminates lateral movement.
How to Fix Squeaky Floors Without Drilling
Not everyone wants to put holes in their floor. Whether it’s a rental, a recently refinished floor, or you just don’t have a drill, there are real no-drill methods that work.
Talcum Powder or Powdered Graphite
The simplest and most non-invasive fix. Sprinkle talcum powder or powdered graphite into the cracks between floorboards. Cover with a cloth and walk back and forth to work the powder deep into the joint. Sweep away the excess.
This lubricates the friction surfaces without leaving any visible damage. It works best for surface-level board-to-board rubbing and is a good first attempt before anything more involved.
Carpenter’s Glue Injection
Using a fine-nozzle glue applicator or a syringe, inject a small amount of carpenter’s glue into the gaps between squeaking boards. Place a heavy object over the area immediately and leave for 24 hours.
This works well when the surface boards are rubbing against each other — the glue bonds them at the edge and eliminates movement.
Wax on Board Edges
A block of plain beeswax or a wax lubricant stick run along the edge of a squeaky board acts as a buffer between boards. It reduces friction without any structural change.
For how to fix squeaky floors without drilling, these lubricating methods are genuinely effective for mild to moderate squeaks — just not for structural movement issues.
How to Fix Squeaky Floors in Old House
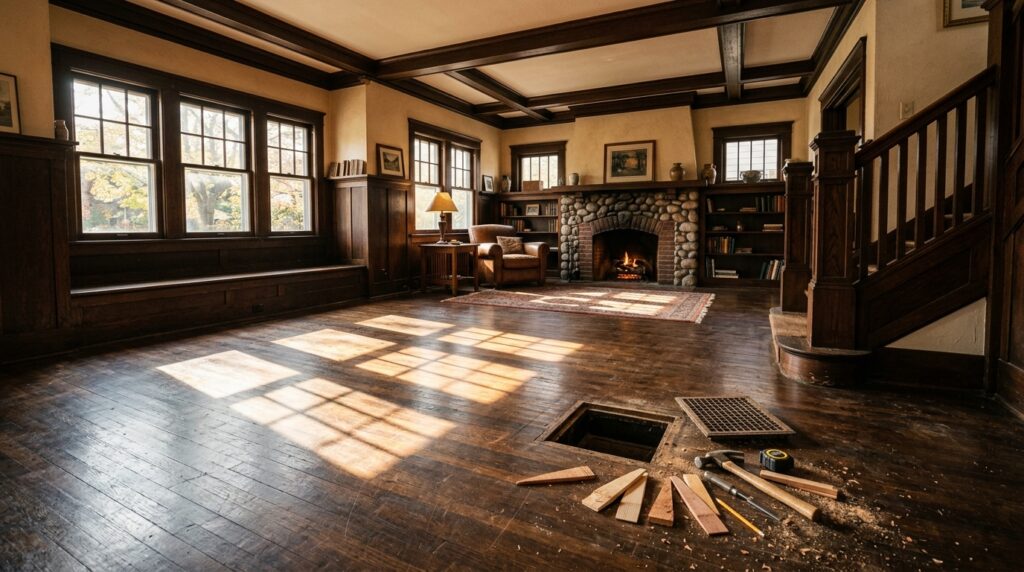
Old houses are in a category of their own when it comes to squeaky floors. The wood has been expanding and contracting for decades. Joists may have slight crowns or bows. Subfloor panels (or even older board subfloors) may have significant gaps.
This doesn’t mean they’re harder to fix — just that you need to approach them with a bit more patience.
Expect Multiple Fixes
In an old house, one screw rarely solves the problem. You may find that tightening one area shifts pressure to another and a new squeak appears nearby. Plan to work through the entire area systematically.
Look for the Original Subfloor Type
Many older homes (pre-1970s) don’t have plywood subfloors. Instead, they have diagonal board subfloors — actual 1×6 or 1×8 boards laid diagonally beneath the finished floor. This type squeaks differently because the boards can move in more directions.
For board subfloors, screwing the subfloor boards down to the joists through the finished floor (using appropriately matched screws) is usually the most effective approach.
Address Seasonal Humidity
Old houses with older wood floors are more sensitive to humidity changes. If your floors squeak mostly in winter (when the heat runs and the air dries out), a whole-home humidifier can reduce wood shrinkage and the seasonal squeak that comes with it.
Be Careful with Old Finishes
Older hardwood floors may have shellac or oil-based finishes that react poorly to some adhesives and fillers. Test any product in a hidden area first. For how to fix squeaky floors in old house settings, the more conservative fix (lubricant first, fasteners second) is always a good approach.
How to Fix Squeaky Floors from Underneath (Crawl Space Access)
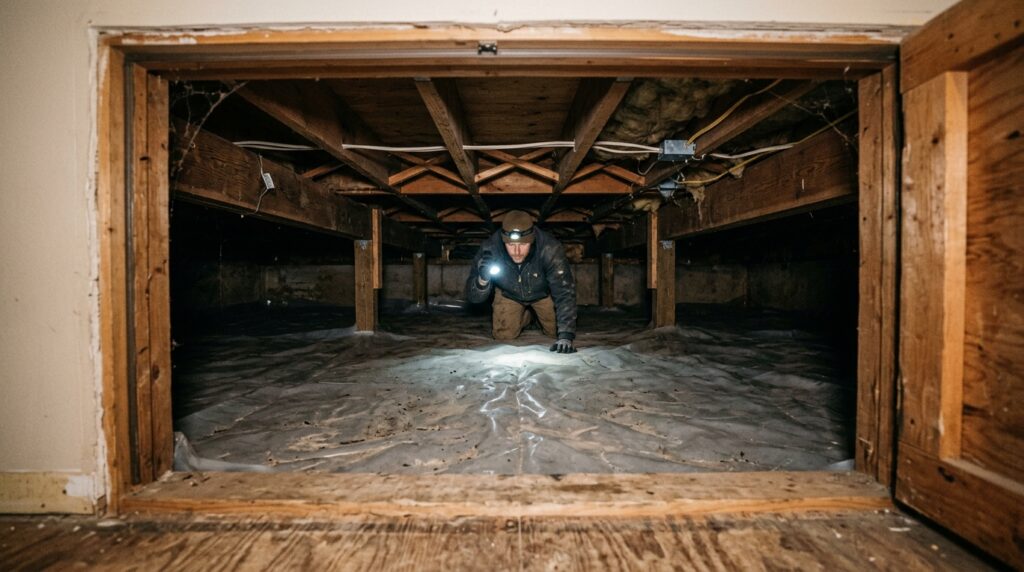
Crawl space access is honestly the best situation to be in when fixing squeaky floors. You can work cleanly without damaging your finished floor at all.
The process is the same as fixing from below, but with a crawl space you have additional options:
Screw up into the subfloor: Drive short screws up through the subfloor from below, angled back toward the joist. Use screws that are 1/4 inch shorter than the subfloor thickness — going too long means punching through the finished floor above. Measure your subfloor thickness first with a tape measure at an access hatch or vent opening.
Add joist hangers or blocking: If joists are twisting or the overall floor system feels soft, metal joist hangers and solid blocking between joists add significant stiffness.
Spray foam for persistent gaps: For small but persistent gaps between a joist and subfloor, low-expansion spray foam can be used carefully to fill the void. Use sparingly — over-expanding foam can lift the floor.
Knowing how to fix squeaky floors from underneath gives you the advantage of seeing exactly where the problem is and fixing it without disrupting the surface at all.
Expert Tips to Stop Floors From Squeaking Long-Term
Fixing the squeak is one thing. Keeping it from coming back is another.
Here’s what professionals recommend for lasting results:
Control indoor humidity year-round. Wood floors are most stable between 35–55% relative humidity. Outside that range, seasonal expansion and contraction work fasteners loose over time. A hygrometer (inexpensive at hardware stores) helps you monitor this. Run a humidifier in winter and air conditioning or a dehumidifier in humid summer months.
Don’t over-tighten screws. When driving screws from above or below, snug is enough. Over-tightening can crack hardwood or compress the subfloor and create a new problem.
Use the right fastener length. Wrong-length screws are the number one DIY mistake in floor repairs. Too short and they don’t catch; too long and they punch through. Measure the floor assembly thickness before buying screws.
Address water damage immediately. Water-damaged subfloor panels swell, warp, and squeak — and they don’t improve on their own. Even a small persistent leak under a bathroom or kitchen will compromise the subfloor over time.
Don’t rely on lubricants alone for structural issues. Powder and wax are great for surface friction. But if the subfloor is loose, those fixes are temporary. Get to the root cause.
Glue your next installation. If you’re replacing flooring in the future, use construction adhesive on the subfloor surface before laying plywood panels, and ring-shank nails instead of standard nails to fasten the subfloor. This dramatically reduces future squeaking.
Squeaky Floor Fix Method Comparison
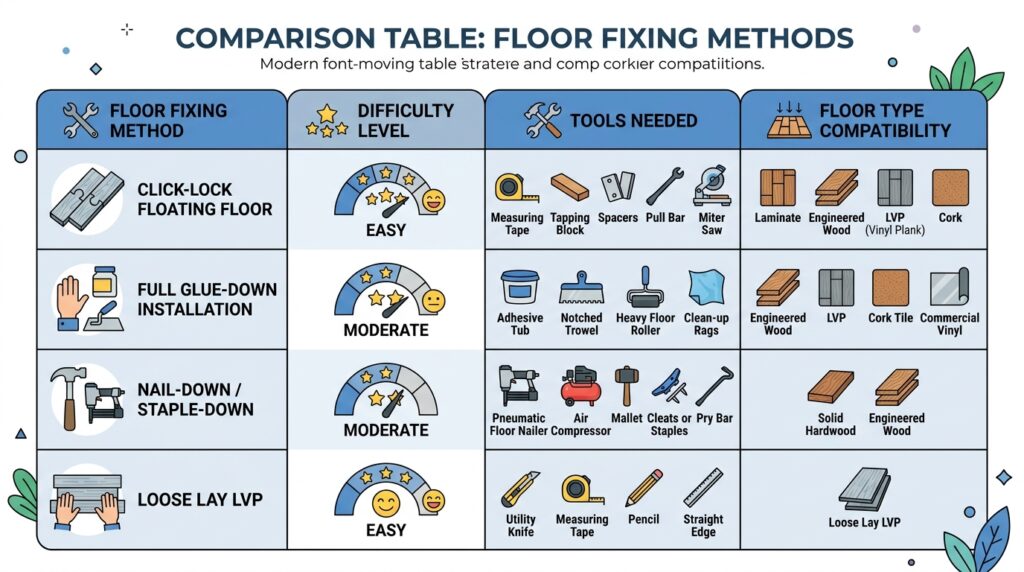
| Method | Floor Types | Access Needed | Difficulty | Visible After? |
|---|---|---|---|---|
| Talcum/graphite powder | Hardwood, laminate | From above | Very easy | No |
| Carpenter’s glue injection | Hardwood, laminate, LVP | From above | Easy | No |
| Screws from above | All types | From above | Moderate | Filled hole |
| Carpet pull-back & screw | Carpet | From above | Moderate | No |
| Shims from below | All types | Crawl space/basement | Moderate | No |
| Adhesive from below | All types | Crawl space/basement | Moderate | No |
| Subfloor blocking | All types | Crawl space/basement | Harder | No |
When to Call a Professional
Most squeaky floors are a DIY job. But there are situations where calling a professional makes sense.
Call a pro if:
- The floor feels soft, spongy, or gives way underfoot — this can indicate subfloor rot or structural joist damage
- You notice water stains on the subfloor in the crawl space or basement
- The squeaking is accompanied by visible floor movement (boards visibly shifting)
- The problem spans a large area of the home and multiple attempts haven’t worked
- You have a historically significant floor that requires specialty restoration
Structural floor issues — especially those involving rot, insect damage, or compromised joists — are beyond a lubricant and a few screws. A licensed contractor or structural engineer should assess those situations before anything else.
For everything else, the fixes above are well within reach of a motivated homeowner with basic tools and a free afternoon.
FAQs About Fixing Squeaky Floors
Is a squeaky floor a sign of structural damage?
Not usually. Most squeaks are friction between floor layers — not a structural problem. However, if the floor feels soft, sags, or has visible movement when you walk, it’s worth having the subfloor and joists inspected. A bouncy or spongy feel is more concerning than sound alone.
Will squeaky floors get worse over time?
They often do if left unaddressed. What starts as a loose nail becomes a loose panel, which eventually causes more fasteners to fail nearby. Fixing squeaks early is cheaper and easier than waiting until the problem spreads.
Can I fix squeaky floors in a rental without permission?
If the fix is non-invasive — like talcum powder in a hardwood joint — most landlords wouldn’t object. But drilling screws into floors or pulling back carpet requires landlord permission first. Always notify your landlord of floor issues in writing. In many places, they’re legally responsible for maintaining floors in a safe, functional condition.
My floor only squeaks in winter. Why?
Seasonal squeaking is very common and usually caused by wood shrinkage in dry winter air. As wood loses moisture, it contracts slightly and gaps open between boards or between the subfloor and joists. The squeak appears when boards rub against each other in those gaps. Running a humidifier in winter often reduces or eliminates this entirely.
How long do squeaky floor repairs last?
Structural fixes (screws into joists, adhesive, shims) are typically permanent. Lubricant-based fixes (talcum powder, wax) usually last months to a year or two, depending on traffic and humidity. If you’re doing a lubricant fix in a high-traffic area, plan to reapply seasonally.
Conclusion: Quiet Floors Are One Afternoon Away
That nighttime creak that wakes the whole house doesn’t have to be a permanent feature of your home.
Whether you’re dealing with squeaky hardwood, carpet over a loose subfloor, a floating LVP floor with movement issues, or an old house with decades of settling — there is a fix that works. And in most cases, you can do it yourself on a weekend afternoon with basic tools and a trip to the hardware store.
The key is starting with the simplest, least invasive fix and working your way up only if needed. Talcum powder costs almost nothing. Carpenter’s glue costs a few dollars. A bag of trim-head screws and a drill are within reach for almost every homeowner. You don’t need a contractor for most of this.
Start with the floor type you’re dealing with, find the relevant section above, and make the noise stop for good.
Got a specific floor situation that isn’t covered here? Drop it in the comments — we’re happy to help you troubleshoot.
")